Having a way for your readers to contact you is extremely important. Your blog should have an easy-to-find contact page that implements a contact form. You can learn how to add a contact page to your blog using this tutorial (Blogger) or this tutorial (WordPress). Then follow the tutorial below to get a contact form added to your contact page.
There are countless ways to add a contact form to your site, but today I’m going to share with you a method that works well on both Blogger and WordPress blogs. Blogger does have a new Contact Form gadget which allows you to easily add a contact box to the sidebar of your blog. Unfortunately, the contact form gadget does not allow the form to be added to a page, which is the ideal location for a contact form. In WordPress, there are a variety of great plugins like Contact Form 7 or Fast Secure Contact Form which are easy to install and use–however, they require the use of a plugin and having too many plugins installed to your site can slow it down.
Today’s tutorial will show you how to add a contact form to your WordPress or Blogger blog without the use of a plugin or gadget by using a service called Wufoo. Wufoo is a fabulous online form building service that is super easy to use. It is hosted on a cloud so it doesn’t require you to install anything to your server. Their interface is really fun to use and is extremely user friendly. They also have a great help section with tutorials for just about anything you may find you need help with. A free account plan from Wufoo includes all the basic form features to quickly accept forms now. The free plan includes 5 free forms and 100 form entries per month.
Step 1: Create the Form
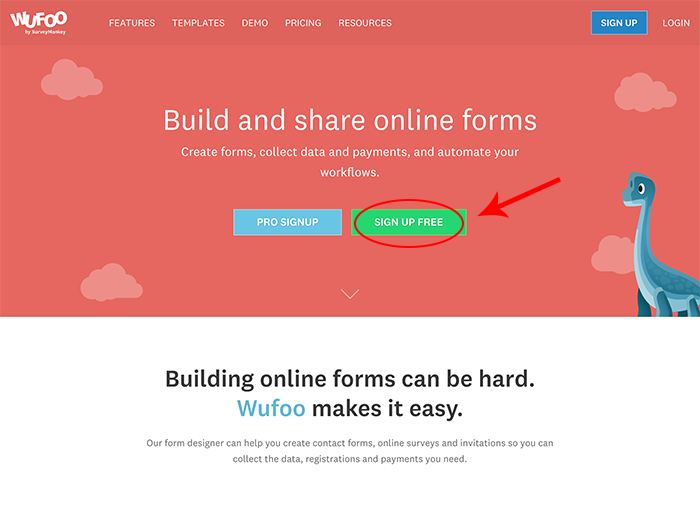
To begin, head on over to Wufoo and click the “Sign Up Free” button. Then enter in the info to create a free account.
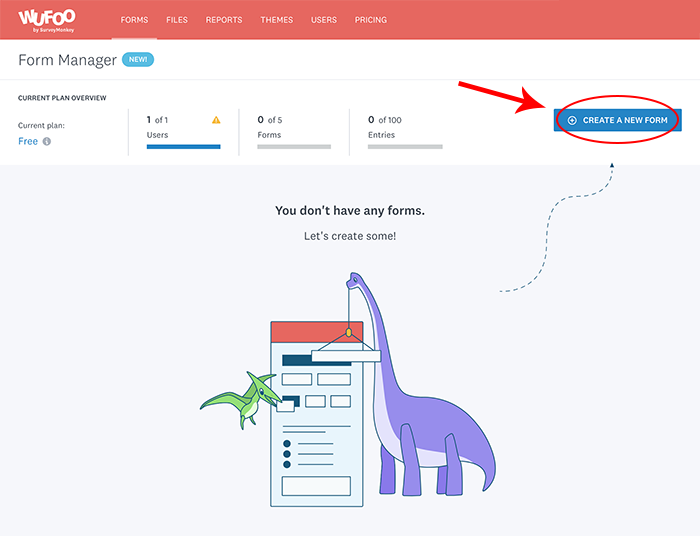
Once your account is created, click on the “create a new form” link.
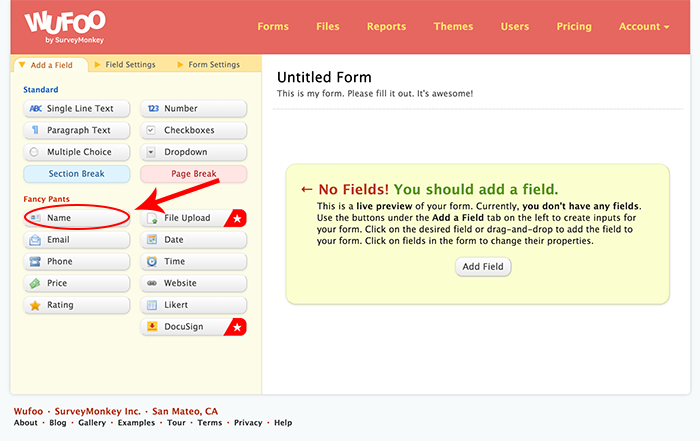
A pop-up window will pop up with two options. Let’s select the “I want to build my form from scratch” box to create a custom form.
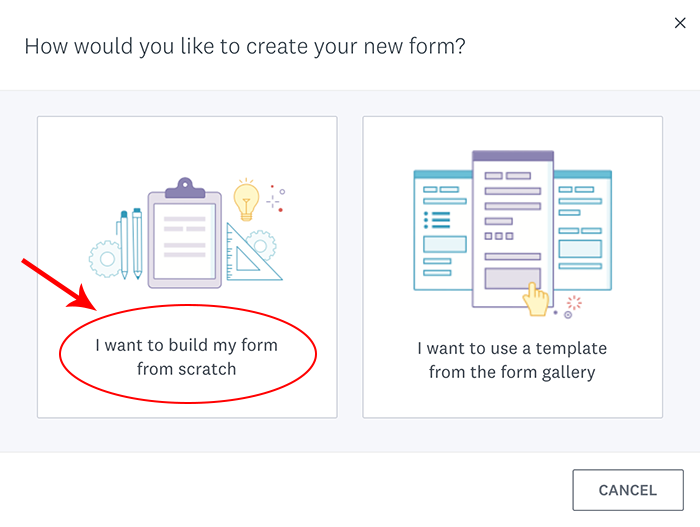
The “I want to use a template from the form gallery” is great if you would like to use a premade form. Wufoo offers a variety of form templates that cover topics such as invitations, sign-ups, order forms, registrations, surveys, and more.
Once on the page to create your form, you’ll definitely want to know the names of the people contacting you, so let’s start by adding a name field. Click on the “Name” button and voilà — the name field will be added. Simple, right?
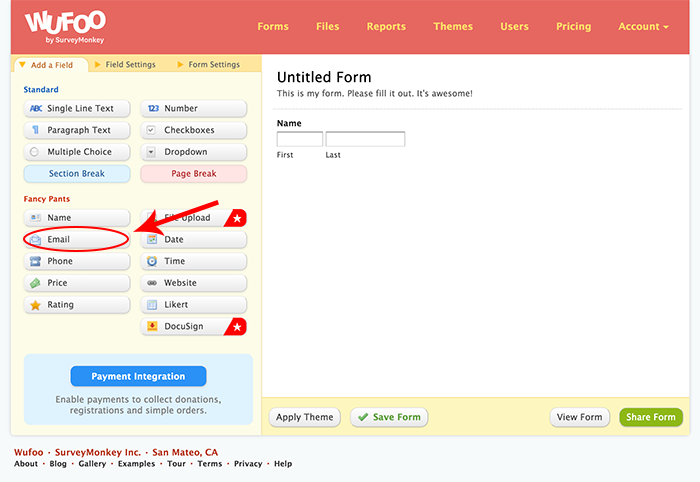
Next let’s add a place for people to leave their email address, so you’ll have a way to reply. Click on the “Email” button to get the email field added.
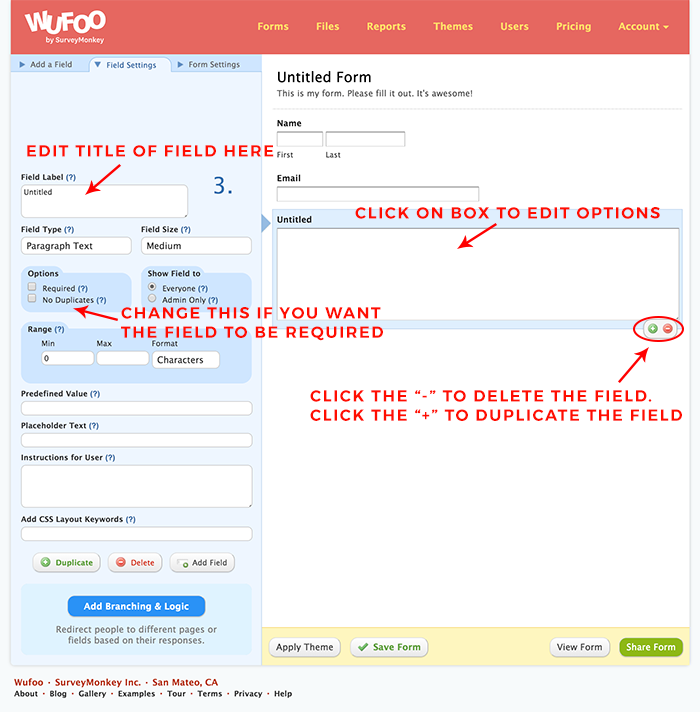
Now you’ll want a place for people to leave you a message, so click on the “Paragraph Text” button to get that added. You’ll notice that this field appears with the title “Untitled.” To title it, click on that field or you can also click on the “Field Settings” tab to edit the options . Give it a title under “Field Label.” You can also select whether or not you want the field to be required. I recommend setting each of the three fields we’ve added to “Required.” You can play around with the different options for each field until you get it looking right. Also, feel free to add any additional fields your form might need.
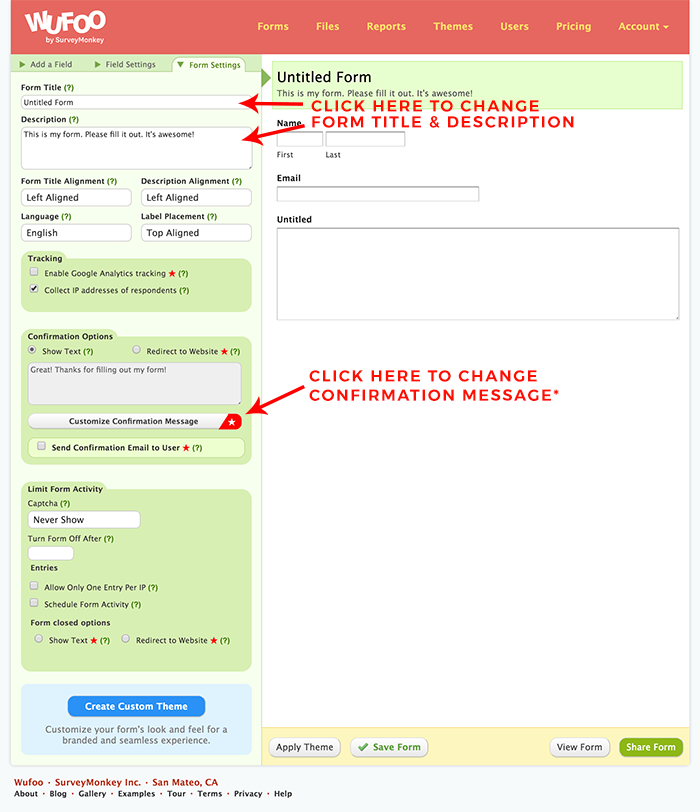
Now you’ll want to title the form, so click on the “Untitled Form” field or click on the “Form Settings” tab to edit the form settings. Change the title to something like “Contact Form.” You can leave the description blank or customize it with whatever you’d like it to say.
*If you have a paid plan, you’ll want to click on “Customize Confirmation Message” to change the message people receive when they submit the form. The field options with a white star on a red background are premium features for paid plans.
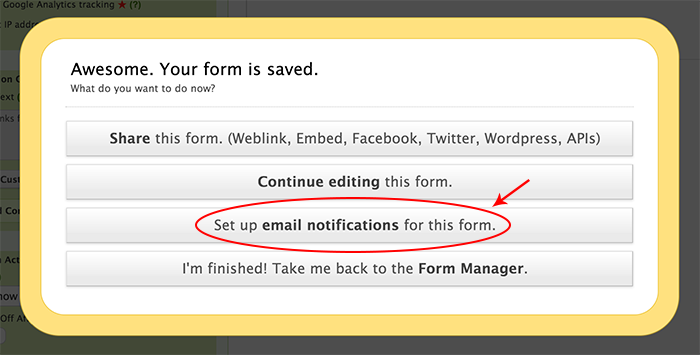
Then click the “Save Form” button at the bottom of the page to save the form.
Step 2: Set up Email Notifications
Now we need to set up the email notifications for the form, so click on the “Setup email notifications for this form” button.
Enter in the email address where you want to receive the forms. Also, make sure to set “Set Reply To” to “Email.” This will allow you to simply hit reply in your email account to reply to each contact form submission.
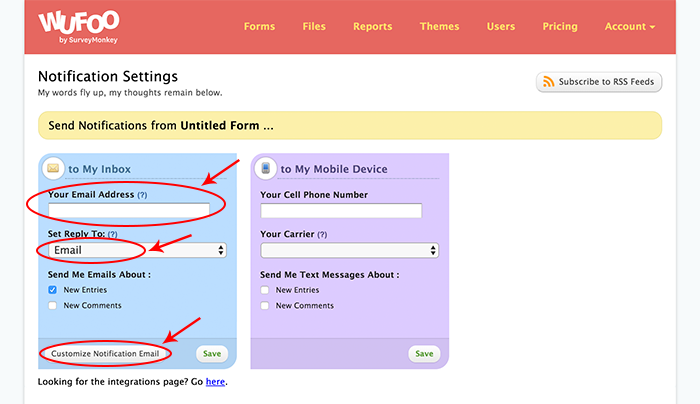
Then click the “Customize Notification Email” and in the pop-up window, under “Your Name or Company” type in your blog/company name.
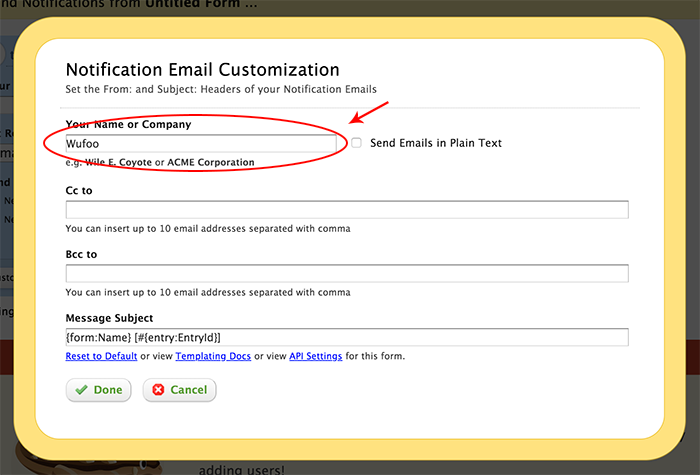
Then hit the “Done” button. You can also set it to send notifications to your mobile device if wanted. When you are done hit “Save.”
Step 3: Embed Form to Site
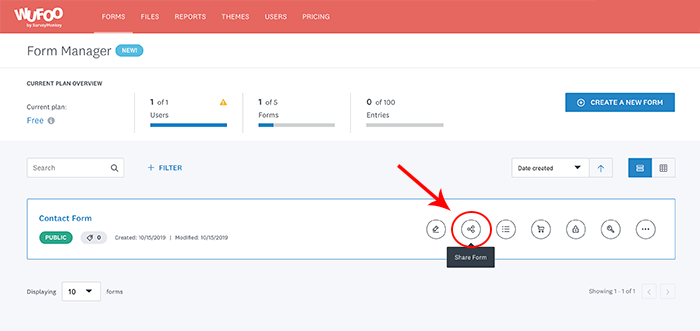
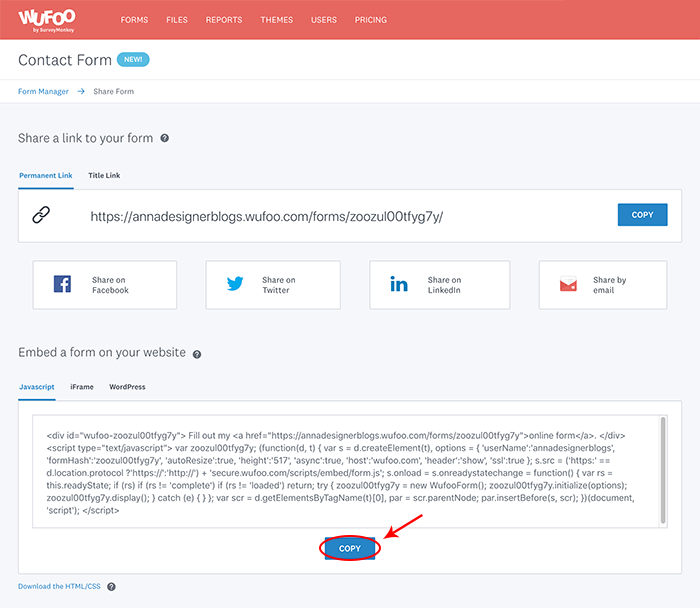
Now click on the “Forms” tab at the top of the page and it will take you to a list of the forms you’ve created. On the Contact Form that you just created, click on the form to show the “Share” button. Click on the “Share” button.
On the share page, scroll down to the “Embed a form on your website” section. Copy all of the code.
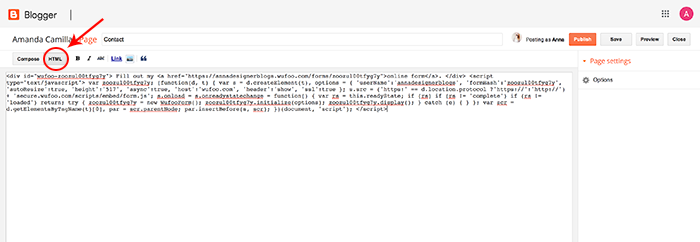
In Blogger, find your contact page and then paste the code into the html of that page.
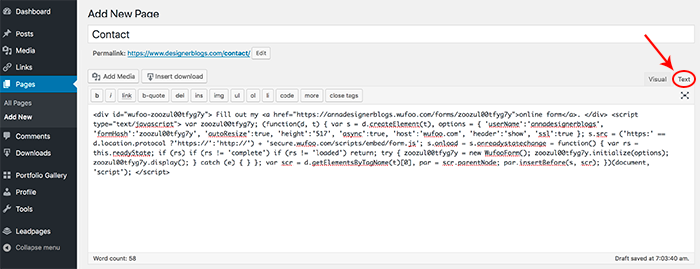
In WordPress, find the contact page and paste the code into the Text editor of that page. You can also install the Wufoo Shortcode Plugin and then paste in the shortcode rather than the html code.
Hit “Update”/”Publish” and then view your page to see your new contact form! Be sure to test it to make sure that it works.
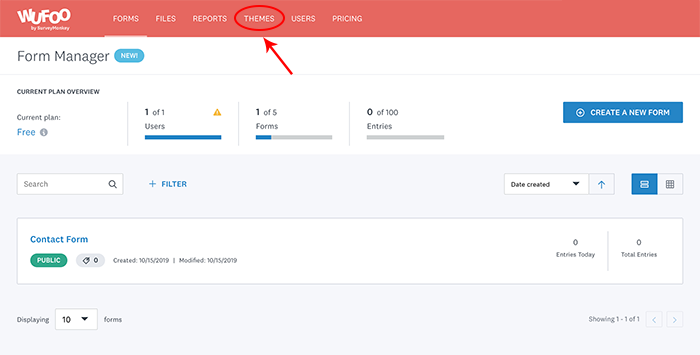
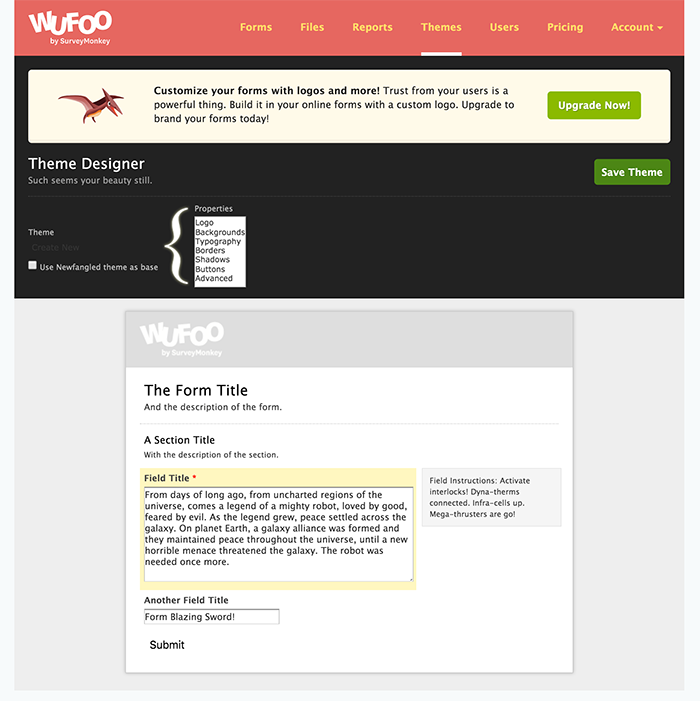
If you want to change the design of the form to coordinate with the design of your site, go to the “Themes” tab in Wufoo.
On this page, you can adjust the colors, fonts, borders, etc.
Please let us know if you have any questions about this tutorial or run into any issues!


Thank you!
You’re very welcome Temeka! We hope you’ve been able to implement it on your site.
Thank you!!!! I followed the steps and got myself a contact page! 🙂
High five Sahra! 🙂
thanks so much for sharing! I’ve been wanting an actual contact form on my blog for ages but was afraid to do it myself, but it was actually really painless!
We’re glad you found it painless. Enjoy your new contact form!
Thx, It will help me a lot 🙂
Thanks for your comment Macie. We hope you were able to get it added.
This is a great tutorial! Love your support! The only feedback I have is that confirmation message is only accessible if you upgrade in Wufoo. Thanks again!
Great!
I was searching for its days and nights. But all added to waste, I didn’t get it at all.
I got it from your blog and I can say it is the best way to add the contact form to your blog,
Cheers…
Nasyx