Have you ever seen graphics with a calligraphy font with lots of fancy swirls and lines, but when you got that font, it was plain and boring? It is because of different glyphs available within a single font family. This short guide will show you how to access them and use font glyphs to make your text look fancy.
What You Will Need:
- Font with glyphs (my favs: the Secret, Cosmopolitan, Vanilla Daisy)
- A program that supports glyphs (in this post, I will be using Photoshop)
How to Use Font Glyphs
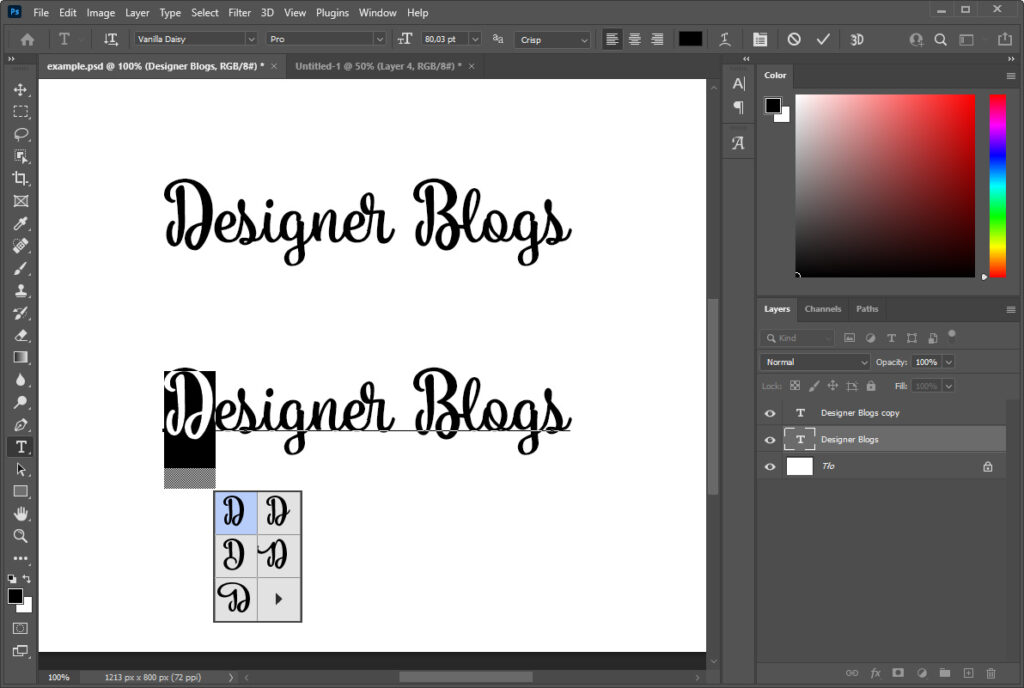
In this post, I will be using a font called Vanilla Daisy. Below you can see how the words ‘Designer Blogs’ looks written out using this font and an example of using some of the glyphs included with Vanilla Dais.
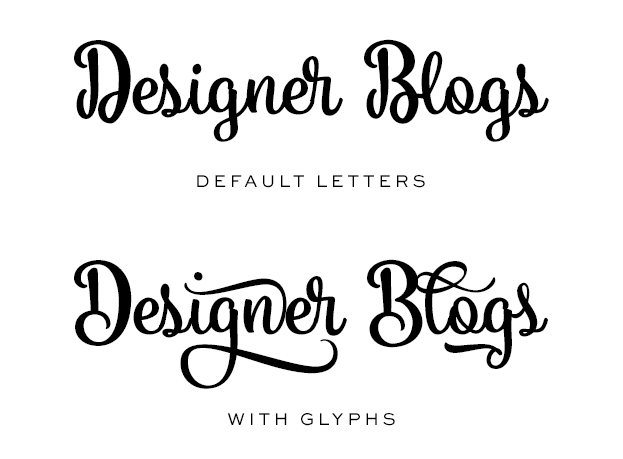
Isn’t it cool? Now let’s learn how to use glyphs and making any text fancier.
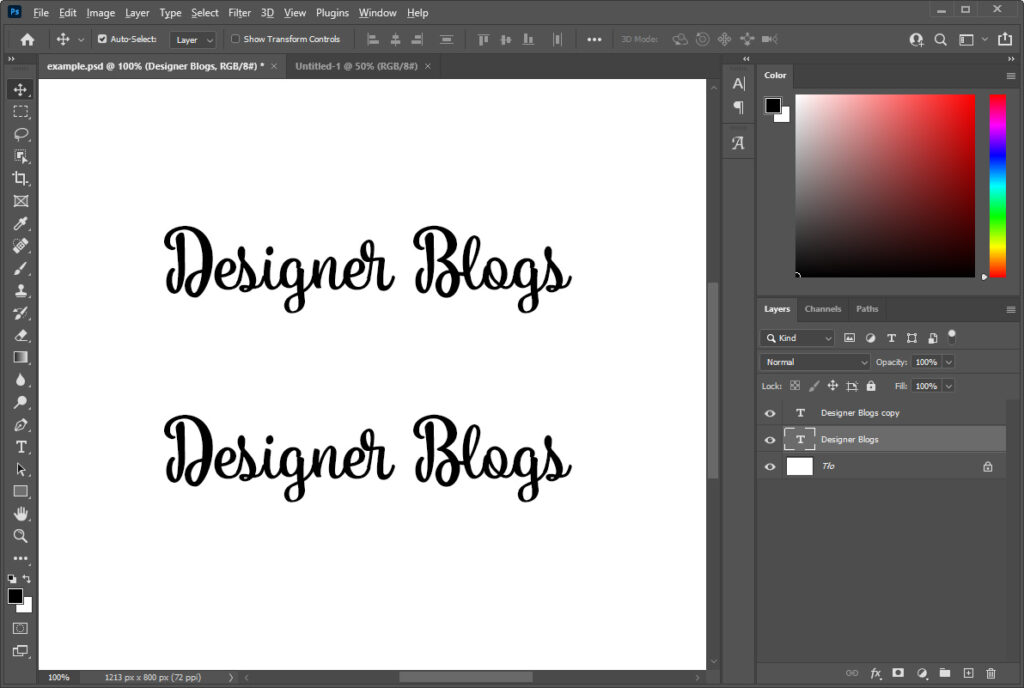
#1 Open your text file
To start working with glyphs, you will need a file with some text. Feel free to open an already existing project or create a blank one just to follow this tutorial. I’m starting with a new Photoshop file where I’m adding two-line of text. Both are the same size, color and use Vanilla Daisy.
#2 Turn on the Glyphs panel
To access the Glyphs panel, you need to turn it on first. Go to the top menu and click on the Window. From the drop-down menu pick Glyphs.
Important: If there is a checkbox next to Glyhps, it means that your panel is already turned on!

#3 Access Glyphs panel
Once the panel is turned on, you can access it by clicking on the cursive A icon on the right.
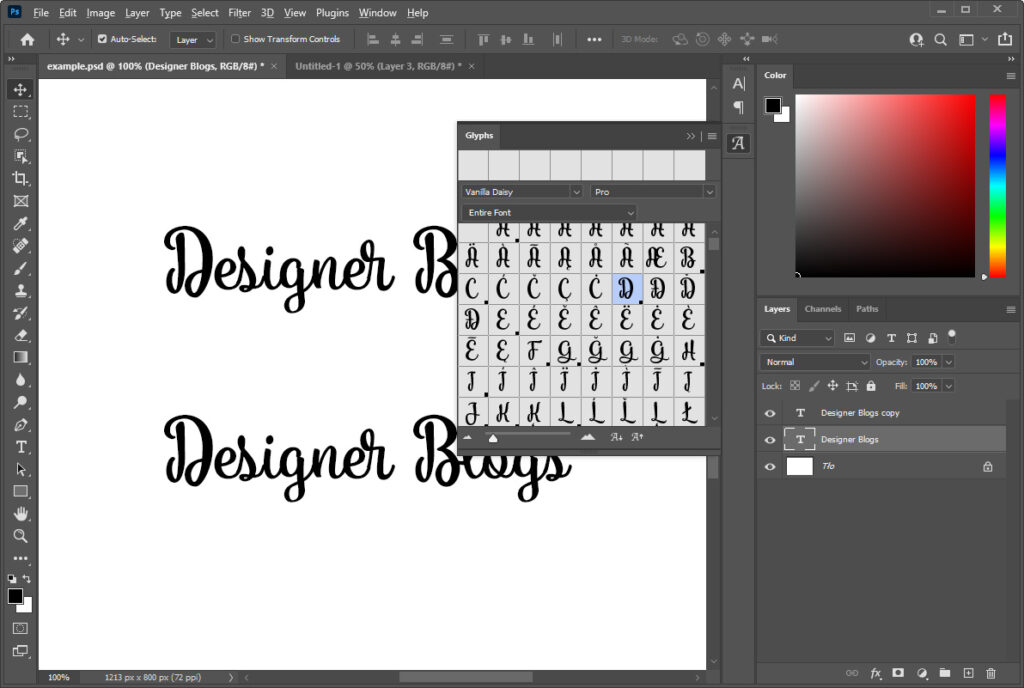
You will notice that some of the letters in this panel have a small black square (or arrow) in the bottom right corner. It means that they have various options you can choose from.
#3 Replace letter with a glyph
The easiest way of finding options for the letter you are looking for is by clicking that letter in the Glyph tab or highlighting it in your text. After that, you can switch the Glyphs tab to show alternatives for your selected letter instead of an entire font.

Click the one you want and Photoshop will swap it out for you.
You cna also use the small glyph tab that should appear next to the highlighted letter in your project.
That’s all! Now you can enhance your text using the full potential of your fonts.
The other great thing about the Glyphs panel is that you can scroll through the glyphs panel to see every character available within a particular font and sometimes find some hidden nuggets that are a bonus to that font.
Using fancy calligraphy fonts has never been more fun! Find great calligraphy fonts at Creative Market. Enjoy!
P.S This post includes affiliate links so by clicking them you are supporting us. Thanks!


Thanks for the tutorial! I didn’t know this about Glyphs! Where have I been… 🙂