Pages are one of the basic elements of your website. Adding them is really easy and will help you sort out your content. In this post, I will show you how to add pages to your WordPress site.
For those new to WordPress who are unsure of the differences between posts and pages, here’s a quick breakdown:
Posts
Posts are content entries listed in reverse chronological order, meaning that your most recent post will appear at the top of the home page of your blog. As a post gets older, the deeper the user has to dig to find it. Your blog will mainly consist of these.
Click here to learn how to create a post in WordPress.
Pages
Pages are meant to be static. You can create them to hold content like your contact details, bio, disclaimer etc. Pages are timeless entries that do not have a date associated with them. Most sites only have a few of these. Pages are usually linked to within the menu bar to create easy access to them.
Adding pages to WordPress
Let’s learn how to add pages to a WordPress blog.
#1 Log in to Dashboard
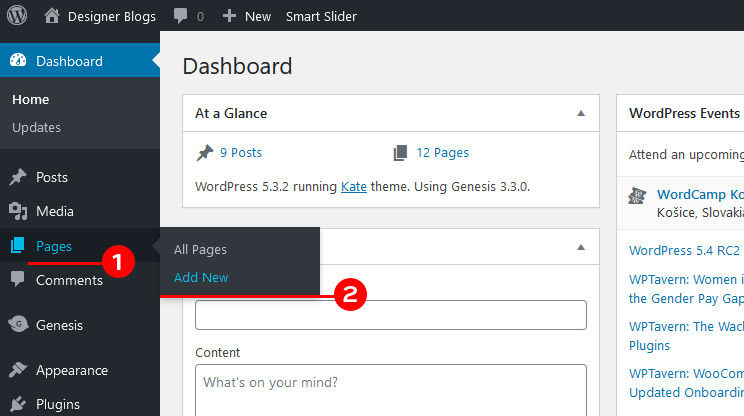
Log in to your WordPress dashboard. Go to the ‘Pages’ tab in the left menu and from the drop-down menu go to ‘Add New’.
#2 Add content
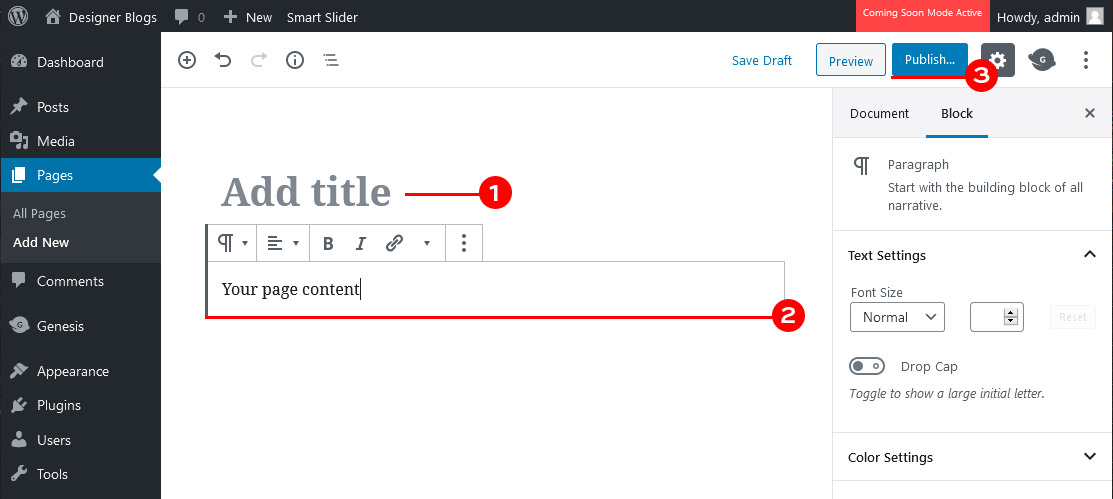
Your new page is almost ready! All you need to do is add a title and page content. After that, hit ‘Publish’ and you will make the page visible to everyone.
If you would like to learn how to work with WordPress post and page creator, make sure to visit our tutorial.
And that’s all!
Edit your new page
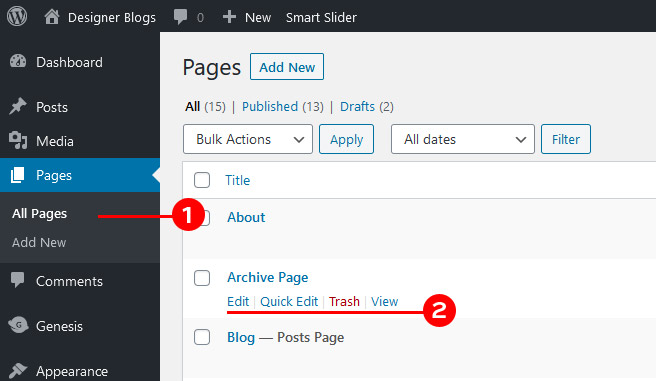
To edit existing pages, go to the ‘Pages’ tab in your WordPress Dashboard. You’ll see a list of all of the pages you’ve created listed there. Hover over one you’d like to edit and click ‘Edit’.
Simple, right? If you are done with creating pages, make sure to check all our WordPress tutorials.



Leave a Reply