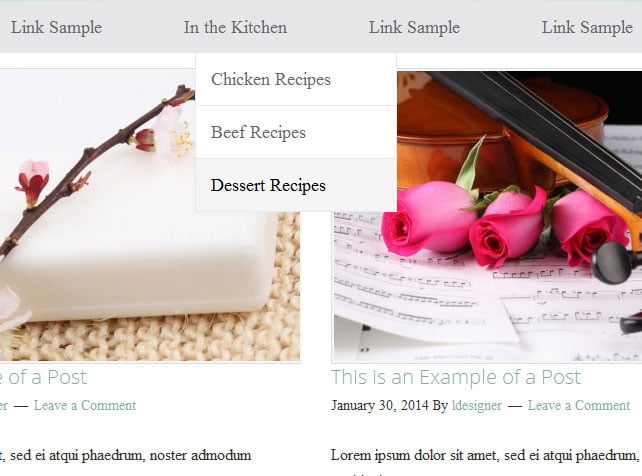
As your blog content grows, it’s helpful to know different methods for featuring categories on your blog. One of the most popular ways of featuring categories is by adding links to certain categories on your menu bar.
If you are a food blogger, for example, you might have a primary menu option titled “Recipes” that when hovered over opens a drop-down with links to all of your categories of recipes. When someone clicks on the “desserts” link in the drop-down of your menu, it would then open a page that shows all of your posts that have the “desserts” category assigned to it.
Pages can be created featuring all of the posts within a single category or multiple categories. This tutorial will show you how to feature categories on your menu in WordPress.
RELATED: Categories vs. Tags – What’s the Difference?
Option 1: Creating a Page Featuring Posts from a Single Category
When you create a new category in WordPress, a page is automatically generated that includes all the posts assigned to that category. To view the direct link to the page of a single category, go to WordPress Dashboard > Posts > Categories.
When you hover your mouse over the category title, a list of options will appear. Click on View to get the direct link to the single category page.
The link is found in the address bar of your browser. This link can then be copied and used in your menu bar as the direct link to that category.

To add the category link to your menu bar, go to Appearance > Menus and then select or create the menu you wish to add the category link to. Then click on Custom Links.
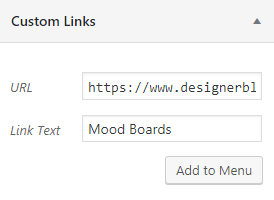
Paste in the category url into the URL box and then title the link. Then click Add to Menu. You can click on the related post link below for further instructions on setting up and organizing a menu.
RELATED: How to Add a Navigation Menu in WordPress
Option 2: Creating a Page Featuring Posts from Multiple Categories
What if you want to create a category page that includes posts from multiple categories? That’s doable too!
Step 1: Go to your WordPress Dashboard and select Posts > Categories. Be sure you have all of the categories created that you’d like included on your new page.
Step 2: Hover your mouse over one of the category titles you want to include and look at the bottom of your screen. You will see a long link similar to the example below.
https://www.designerblogs.com/wp-admin/edit-tags.php?action=edit&taxonomy=category&tag_ID=52….
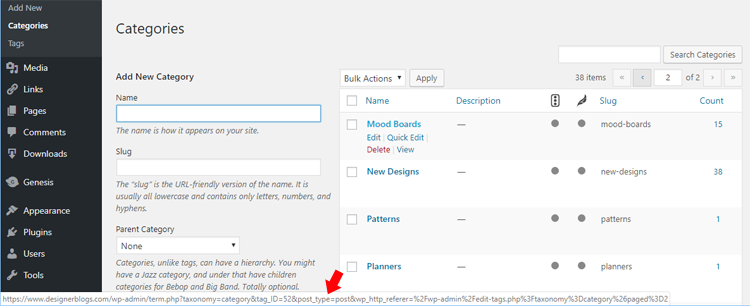
The link includes the ID number for your category. In this example, it’s ID=52. Do this for each category you want to include and note the ID numbers for each.
Step 3: Create a New Page with a title that will describe your categories. In this example, we’ll have a category page for Dessert Recipes that will include recipes from the following categories: cupcakes, cookies, and brownies.
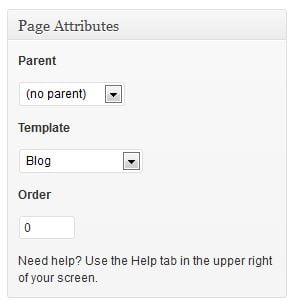
Step 4: Under Page Attributes, select Blog as the Template type.
Step 5: Next you will need to enable a feature called Custom Fields. At the top of the page editor window, you will see a tab called Screen Options.
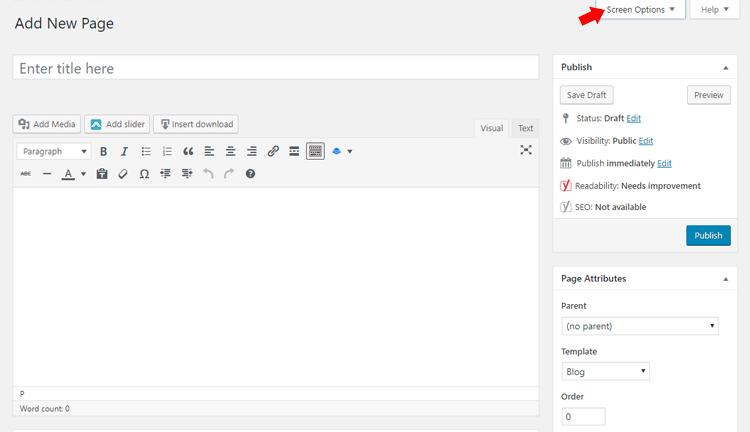
Check the box by Custom Fields.

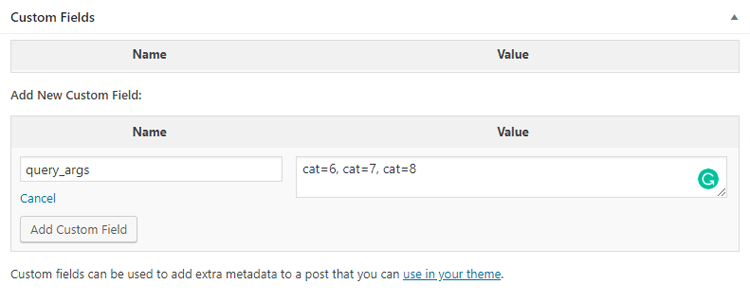
Step 6: Scroll to the bottom of the page editor window until you see the newly added box for Custom Fields. Click the blue Enter new link and then enter the text “query_args” in the Name field box.
In the Value field box, you will use the category ID numbers that you noted in Step 2. Separate the categories with commas as shown below. Then save or publish your new category page.
To add this new category page to your menu, go in your dashboard to Appearance > Menus. Select or create the menu you wish to add it to. Under Pages > Most Recent, you’ll see a list of your most recently created pages. Your newly created page will be listed there.
Check the box next to the page and then click Add to Menu. Again for more detailed information on creating and organizing your menus, please visit this post: How to Add a Navigation Menu in WordPress.
If you’d like help customzing the look of any of your category pages, we’d love to help you! Click here to request a quote.



I followed your tips and it really works very fine. Now I can show my each post on individual category according to the theme of the blog post.
Thanks
Hello! Thanks for these tips; exactly what I was looking for! Question though: for option 2, is it possible to add text to the new page? I wanted to add some intro text before the links. Thanks in advance!
Can you please send me a link to your category page? I will check what can be done.
THANK YOU for this!! I was stuck on the links & now it looks great!!
This is not working in my website, the ‘homepage’ becomes blank. Please help
Can you please contact us at [email protected]
This is a really useful post as I try to plan a teacher support site for my wife.
I have some (newbie) questions though. First, is there such a thing as sub-categories in WP? My wife teaches 4 different college grades (which I will turn in categories). Each main category has different sub-categories. for example, the main category “Year 1” has Poetry, theatre and Litterature sub-categories.
How do I best implement sub-categories so that I can do what you suggest above but with the added functionality of creating a page showing all posts for a sub-category, not just a page with all posts for the top category (which I will also implement)?
Thank you for your suggestions and thank you again for a post that has set me on the way to ask the right questions before launching in.
Christophe
Sure, you can have subcategories in WordPress. All you need to do is add the main (top category) as a parent for your subcategories. You can display each category as a page or use WordPress blocks to display multiple categories on one page. This tutorial is quite old and was created back when there was no block editor in WordPress 🙂
I had to search long and hard for a solution and this saved me! Thanks so much for the perfect, detailed instructions!