Managing a blog involves much more than writing posts and replying to comments. Every now and then, you might want to refresh your blog’s design, fix a layout bug, or add new features. If you aren’t particularly tech-savvy, this can quickly feel overwhelming – and that is completely normal!
When you hire a designer, developer, or assistant to help, they will almost always need access to your Blogger dashboard. Rather than handing over your personal Google account password, you can invite them directly with their own email.
This method requires a small amount of back-and-forth communication while an invite is accepted, but it keeps your private Google login credentials 100% safe and confidential.
Watch the guide on YouTube or read the full guide below
Sending Blogger Invitation
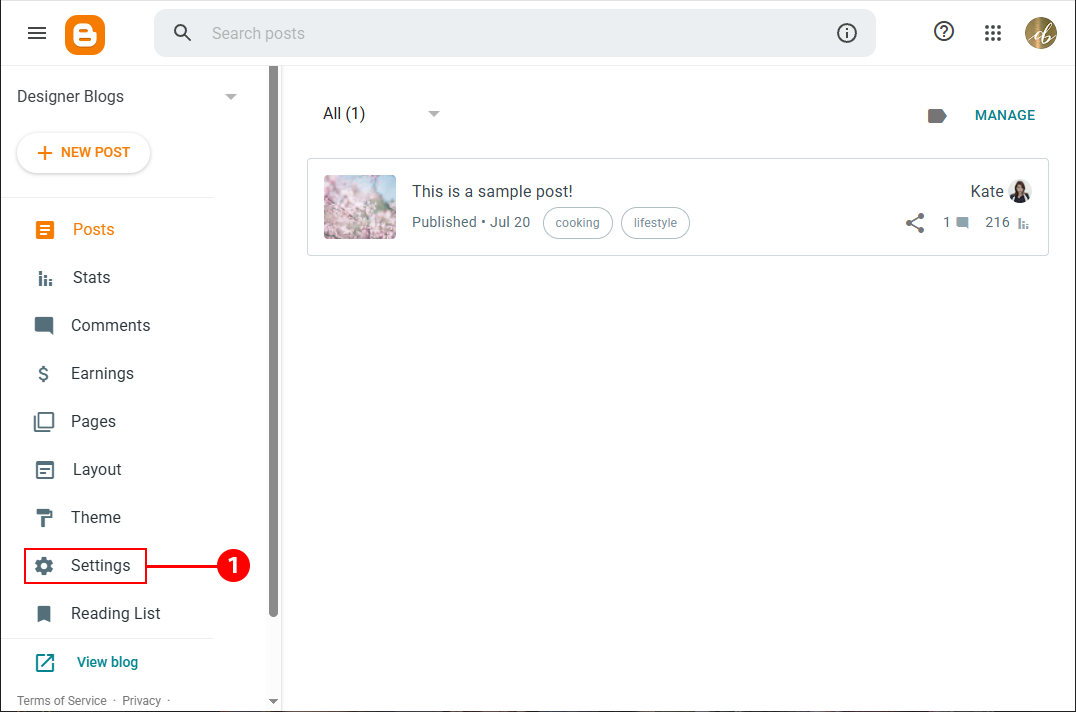
Step 1: Open Your Blog Settings
Log in to your Blogger Dashboard and in the left-hand sidebar, click on Settings.
Step 2: Send the Author Invitation
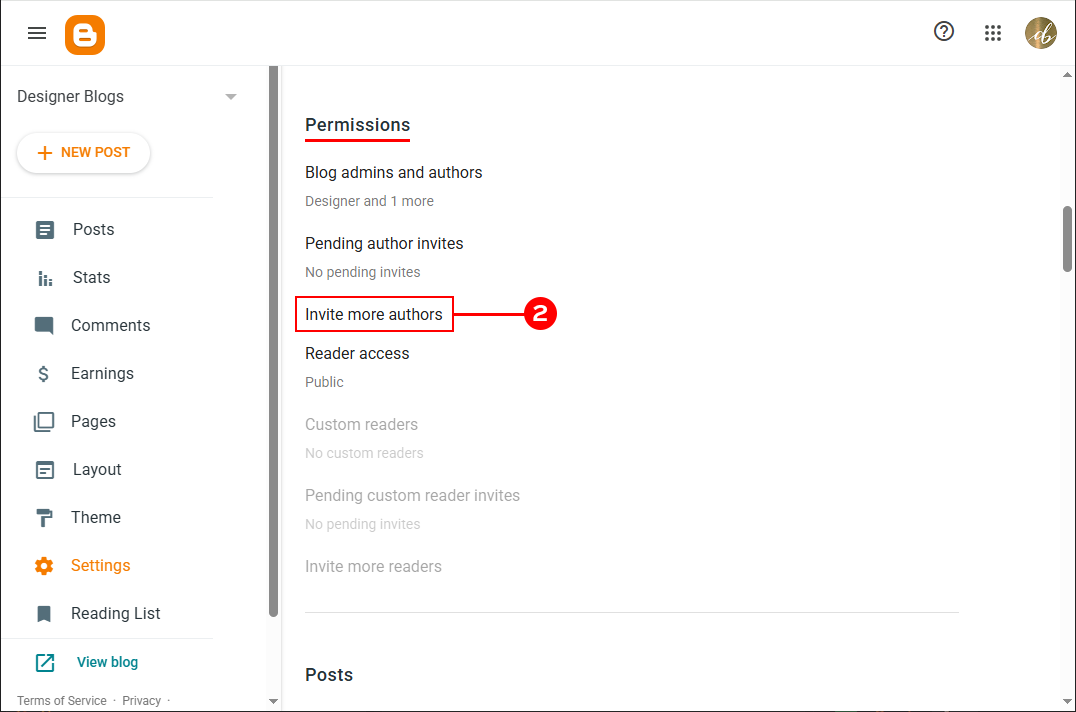
In the Settings menu, scroll down until you reach the Permissions section. Click Invite more authors.
In the pop-up field, type in the email address of the person you want to grant access to, then click Send.
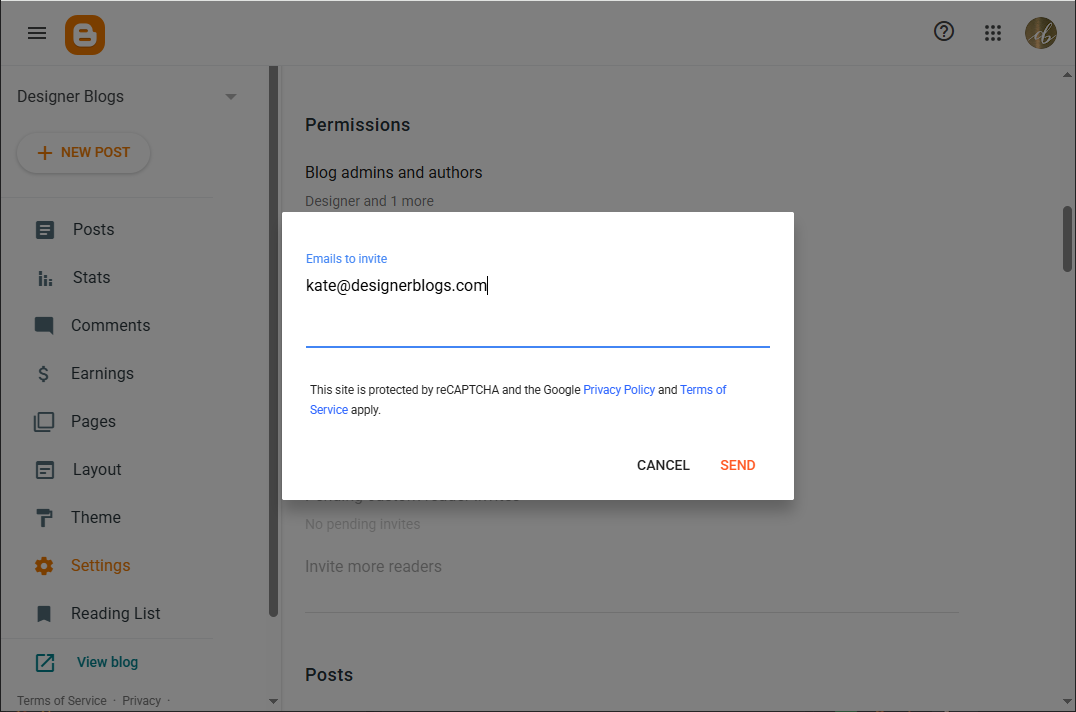
Blogger will immediately dispatch an email invitation with a confirmation link. While you wait for them to accept, their email will show under Pending author invites.
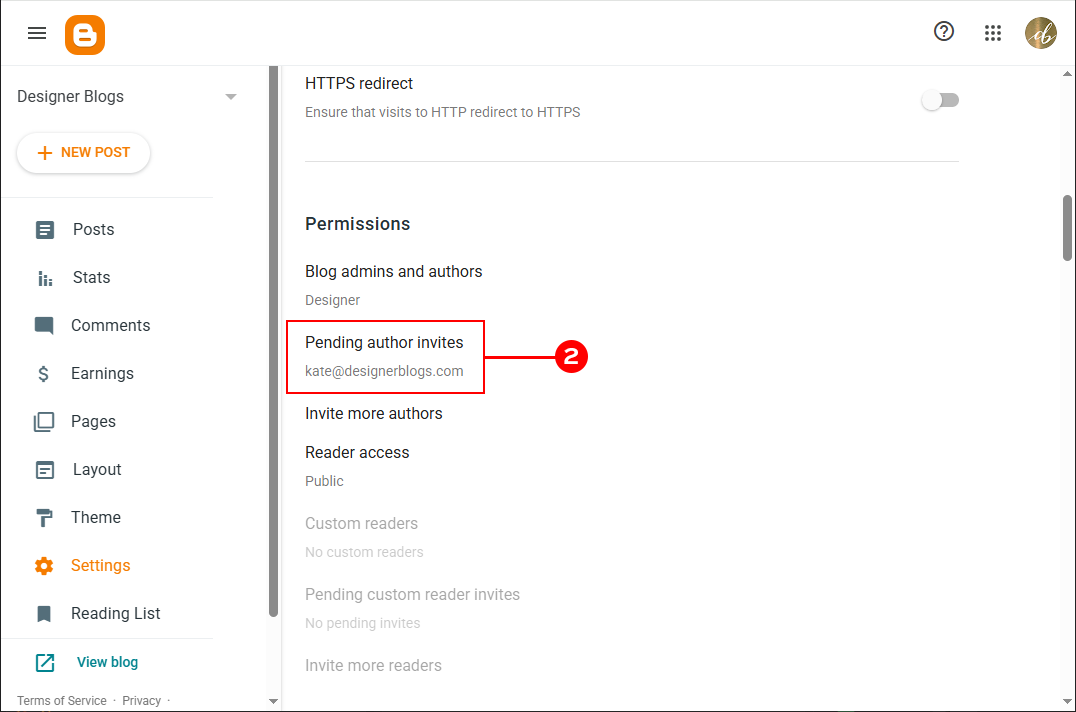
Grant access to blog
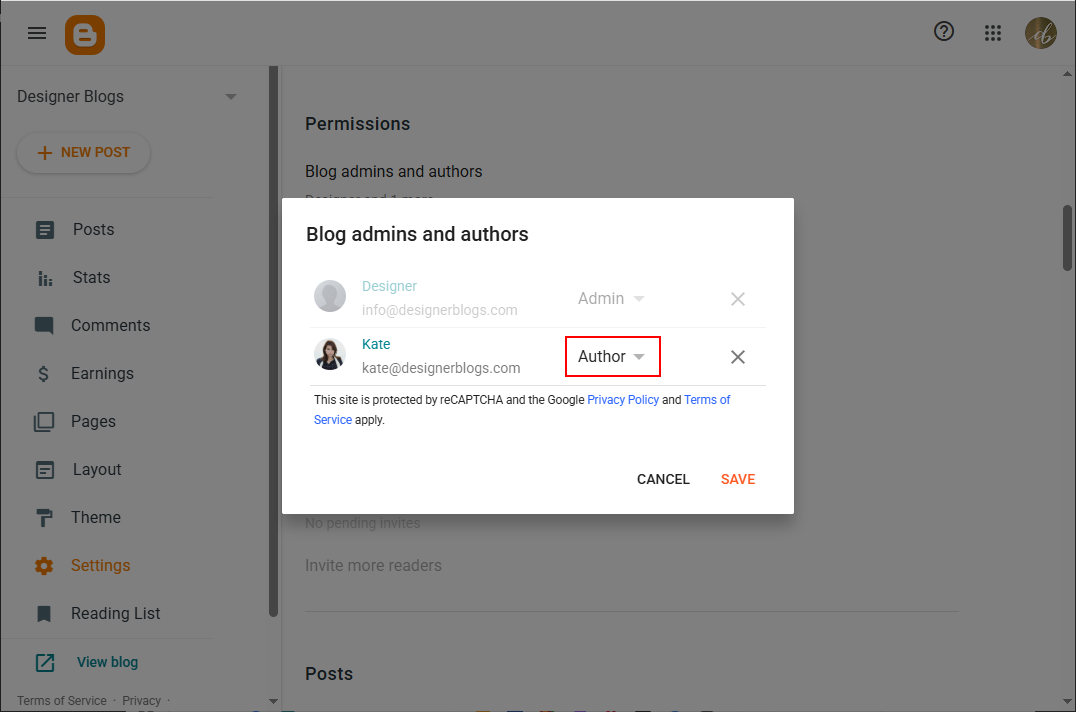
By default, new users only get basic “Author” rights (writing posts). If you hired someone to customize your template, edit code, or install widgets, they need full administrative access.
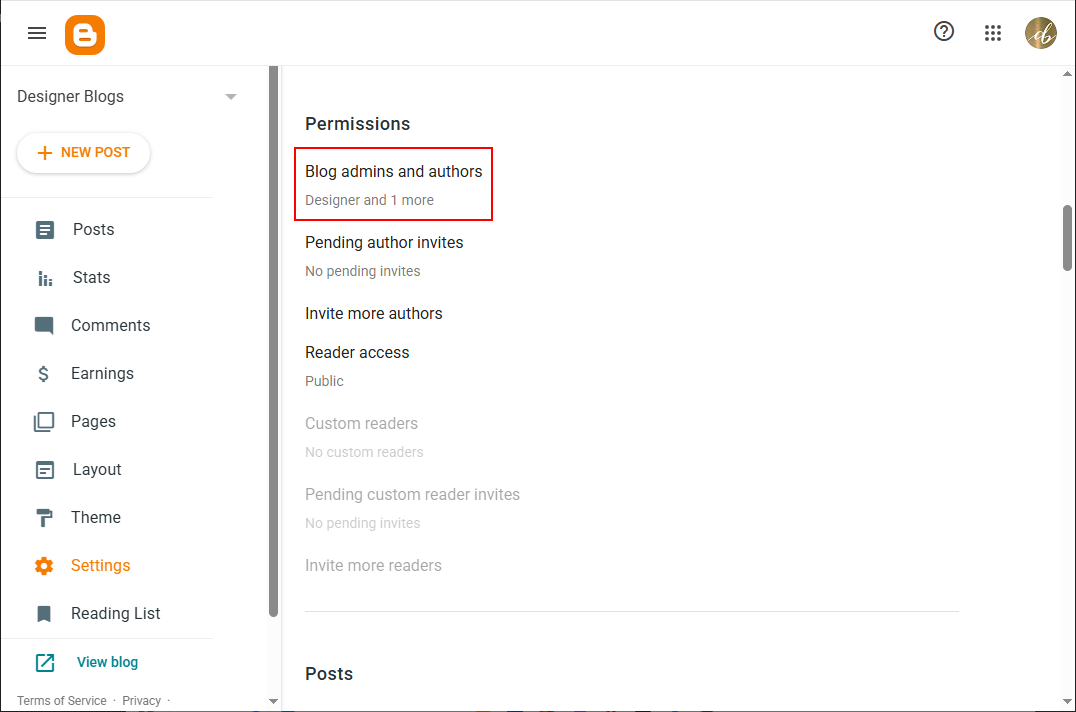
- Once the invited person has accepted the invitation, return to your Settings > Permissions section.
- Click on Blog admins and authors.
- Find their email address on the list.
Click the drop-down menu next to their name, switch their role from Author to Admin, and click Save.
That’s all!
Removing blog admin
Once the design project is finished or you no longer need external help, removing access is just as straightforward:
- Return to Settings > Permissions > Blog admins and authors.
- Click the “X” next to that person’s name or email address.
- Save your changes. Their access to your blog dashboard is revoked immediately.
I hope this tutorial made granting access to your Blogger blog quick and easy! If you run into any issues or have questions, feel free to drop them in the comments below.
If you are looking for more check the one below or visit our blogger tutorial section.



You have such great advice here, thank you! I linked your tutorials page to my blogging post today, you've got so much good information!
Thanks so much for visiting and for linking to us Heather! We hope you’ll visit again.