Did you know that you can customize fonts for some of the Blogger elements with just a few clicks? Such a feature is available with all default Blogger templates and our Blogger Themes. It’s nice to be able to change even the smallest of things on your blog to match your personal style more closely, but changing things up on your blog by yourself can be intimidating at best. But the good news is, Blogger has made this pretty easy. In this short guide, I will show you how you can use custom fonts with Blogger.
Access your Custom Fonts with Blogger
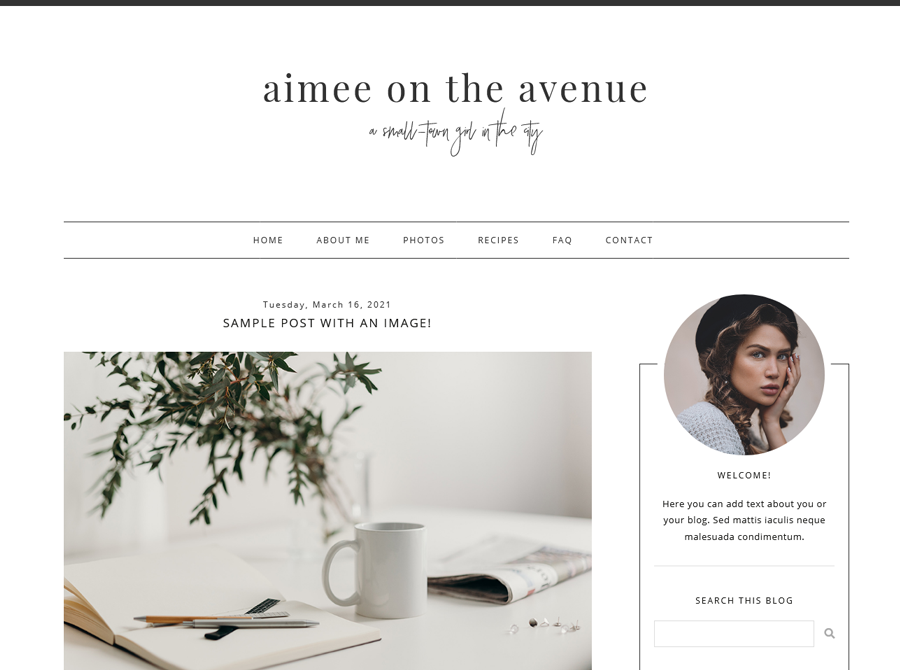
As an example, I will use one of our premade Blogger templates called Aimee
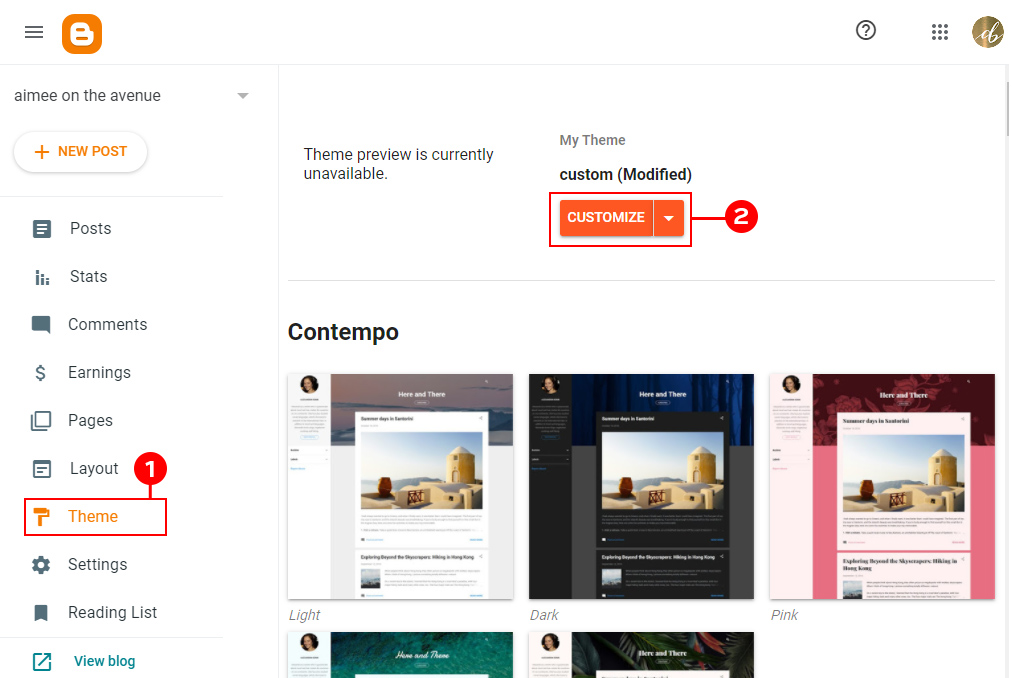
To make your changes, you will need to log in to your Blogger and click on your Theme (1) tab in your dashboard. Then click on the orange Customize (2) button to be taken to your theme customizer.
This is what your Theme Customizer looks like. As you can see, there are quite a few options to click on the left. Today we will focus on the Advanced (3) tab.
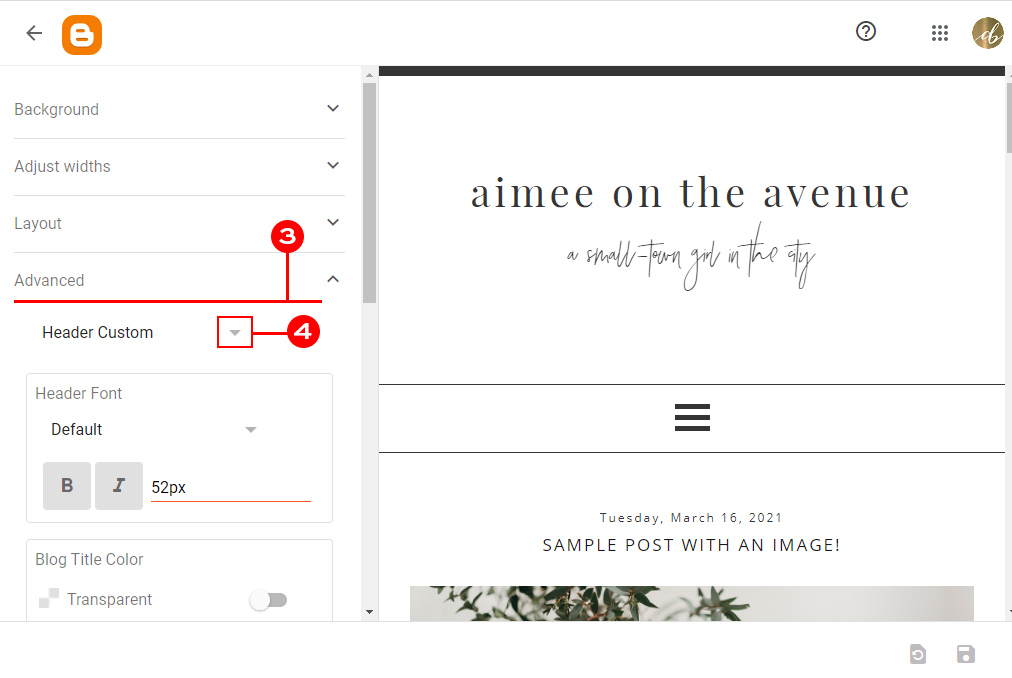
Using the small arrow (4) just below the advanced tab name, you can pick a section of your blog which you would like to edit. Our templates come with a couple of them however, if you bought the design somewhere else, you might notice that your design is not customizable or have just one or two options to choose from.
Browse the options on the left side of your screen (5) and change the font style, color, size, and more! You will find here lots of custom fonts that can be used with Blogger. Go ahead and play around with these a bit without being scared because nothing here gets saved unless you actually save your changes.
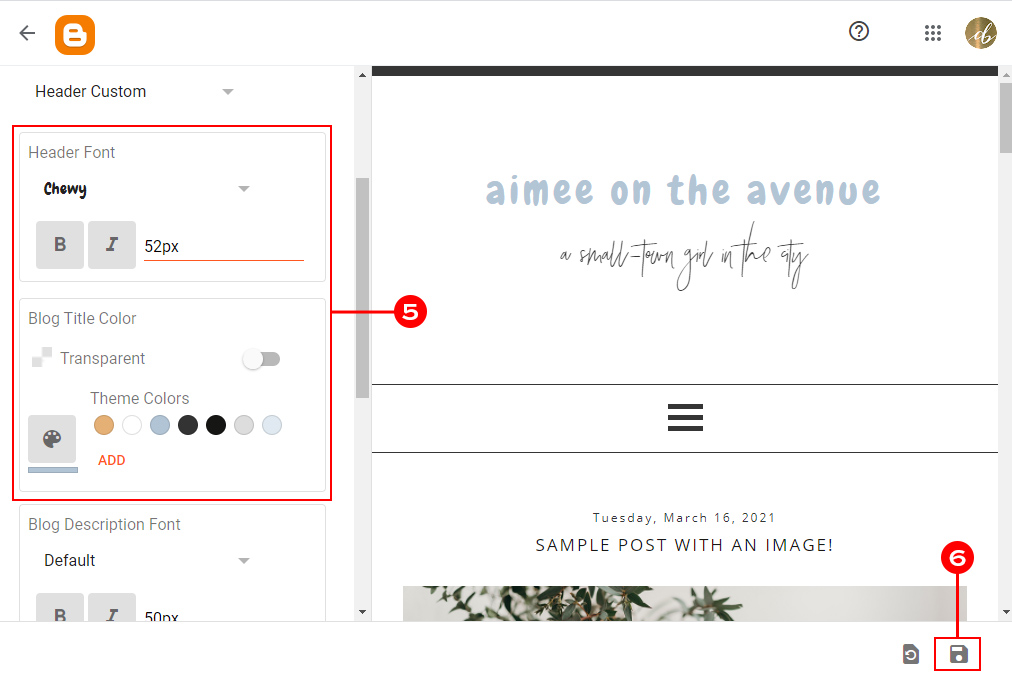
As you are making changes in this area, you will see a preview of how the changes look on your blog so you can get things set how you like them before they are actually saved to your live blog. Don’t be afraid to click on the different options and make changes. Again, nothing will be saved to your live blog until you hit the Save button (6)
When you are happy with the results, click the save button (6) at the bottom right corner. You can also use the button next to save to reset unsaved changes.
That’s all!
You have just customized fonts on your blog. As you see, using custom fonts with Blogger is very easy and takes only a few clicks. I hope that this short guide will help you make your blog perfect.
If you have any questions, make sure to leave them in the comments below.



Such very helpful information! I am so grateful for this enlightening information you have given to me here. I now know how to use customized fonts with blogger.
Thanks for sharing this..