As simple as it is, adding labels to Blogger posts can help you organize your blog and clean it up. It lets you sort out your content and make all the post topics easy to access for your readers. In this short guide, I will teach you how to add labels to Blogger Posts.
How to Add Labels to Blogger Posts
Follow this quick, three-step guide to have your post sorted out.
#1 Create a new post or edit an already published one
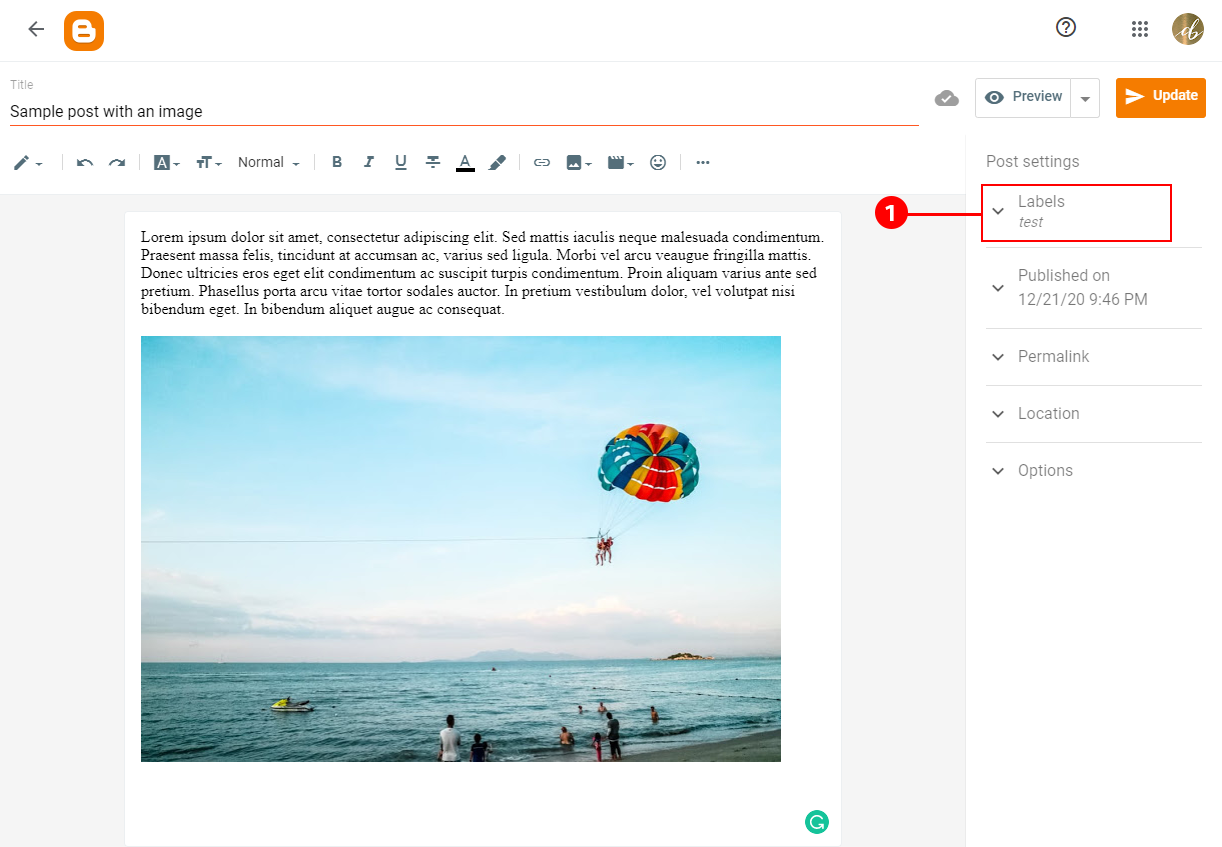
Either compose a new post or click on an already published post to edit it. On the right-hand side, there is a menu called Post Settings. Click on the first option at the to called Labels.
#2 Adding Labels to Blogger Posts
Type in all of the labels that you would like to categorize your post by. Make sure a comma and space separate each label. Try to keep it simple. I usually add around 1-3 labels unless I really need to add more.
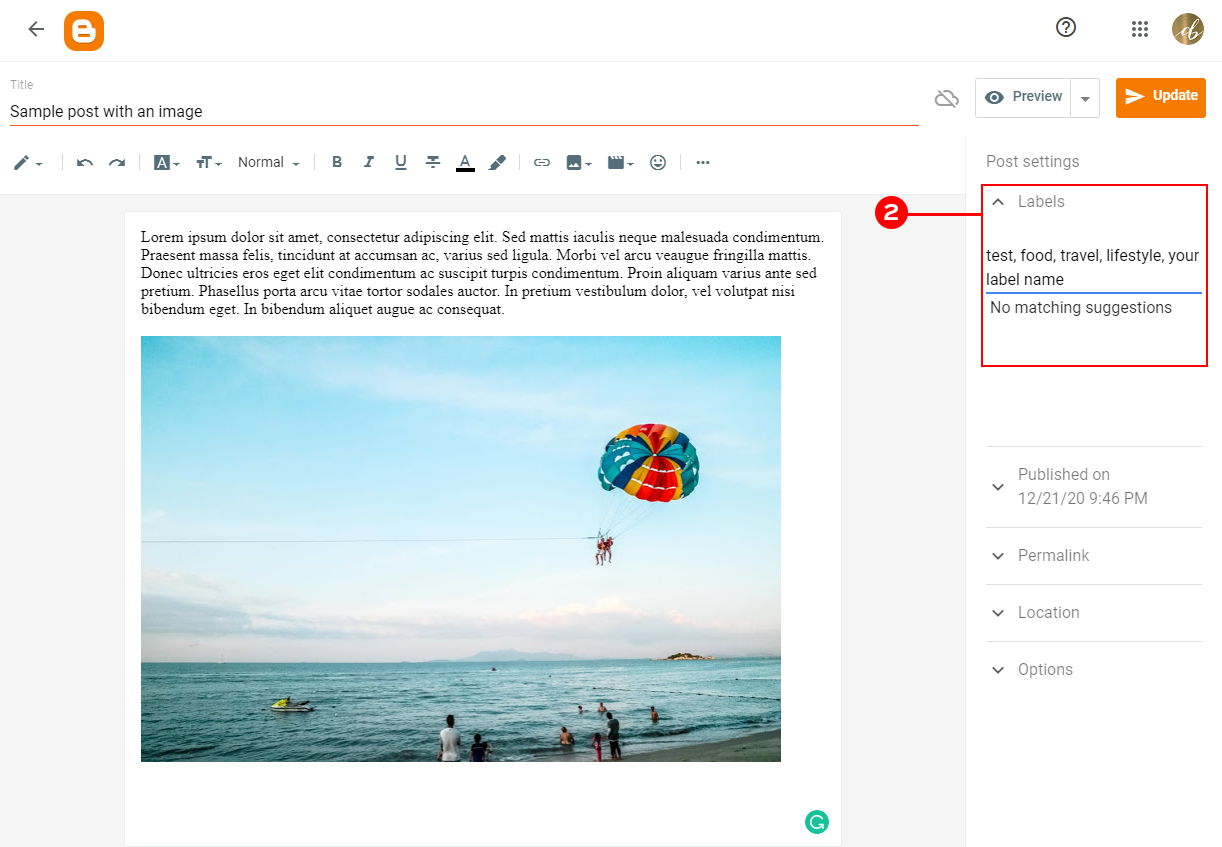
If you already added some labels in the past, Blogger will suggest them when you start typing.
Once you will add your label, publish your post.
#3 Check your post
When you view your published post, you will see your labels appear at the bottom of your post.
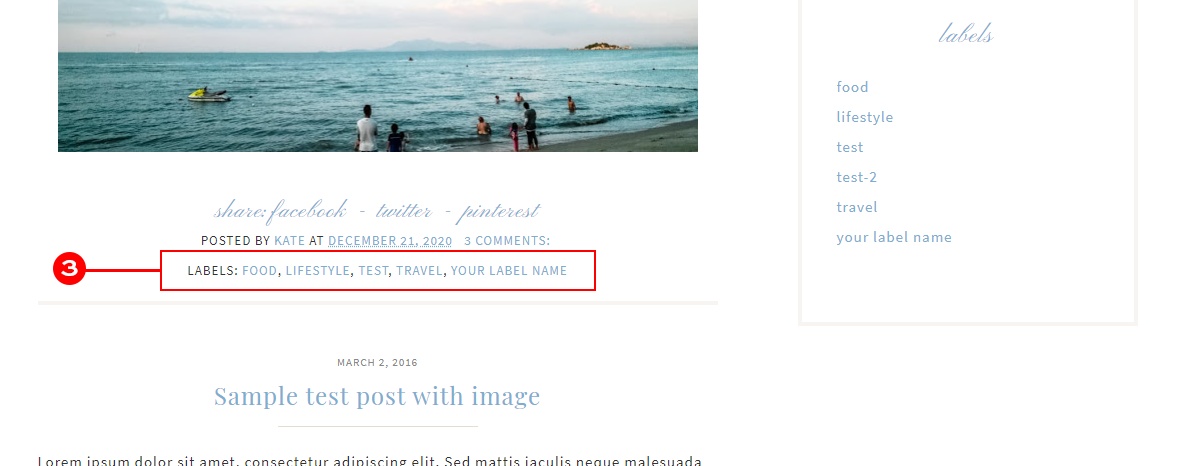
Keep in mind that not all Blogger template displays label.
Labels Widget
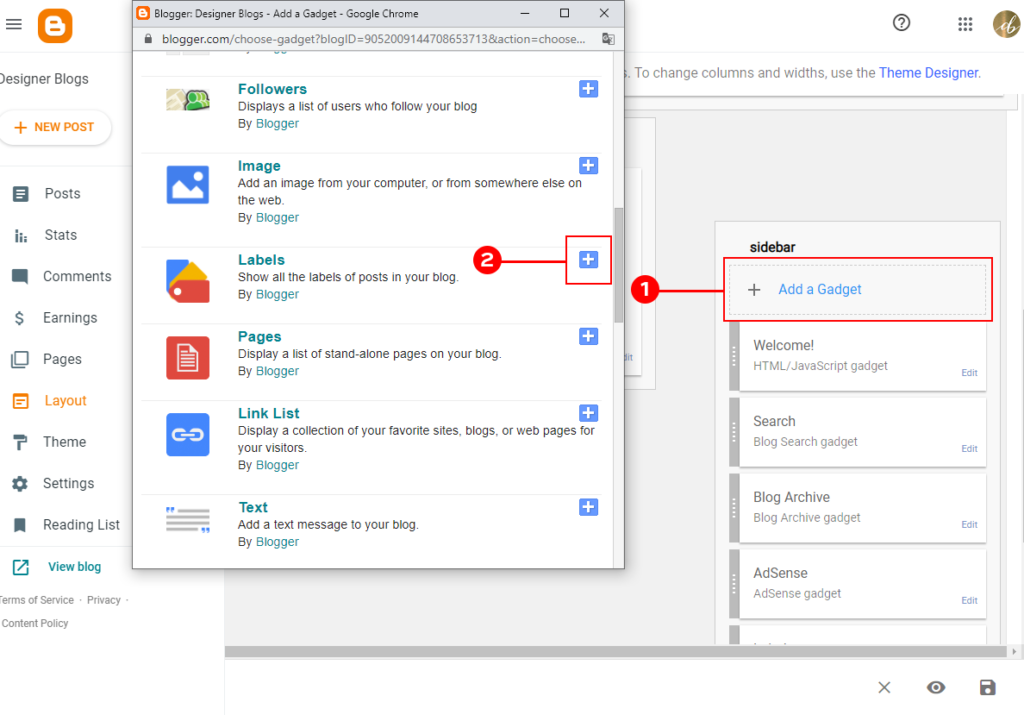
Did you know that you can display all labels as a sidebar widget? There is a built-in gadget with many options to list your labels on your sidebar for easy reference.
If you would like to add one, log in to your Blogger Dashboard and navigate to the Layout tab on the left. Once there, add a label gadget to the sidebar of your choice. On the image below, I’m adding this widget to the right sidebar.
Getting a link to your label
Let’s say you want all of your posts that have the label Food to automatically appear under your navigation bar’s corresponding category. To do so, you will need to have a link to your label page.
The easiest way of getting one is by visiting a post assigned to your chosen category and clicking the label name at the bottom of it. You can also click it in the sidebar widget if you are using one.
Each label page will usually have a grey bar above the post informing you and your readers where they are.

Copy the link from the top of your browser and use it wherever you need.
Learn how to add links to your Blogger Navigation Bar
I hope that with this guide, you learned that adding labels to Blogger posts is really easy. If you have any questions, make sure to let us know in the comments below.


please, how can i post on an inbuilt category…. View my blog to see what i mean… http://www.soccersithnews.com... Categories like technology, business, fashion, gallery etc… All these categories are empty when clicked on them…. Please i will be waiting for your reply through my email..@ [email protected]
This tutorial should help you: How to Link a Menu Bar Link to a Label
thanks you very much for this information. so useful for my blog development and improve viewers.
thanks for this information. so useful for my blog development
A very good tutorial. Thank you.
Loving these sort of tutorials that you have published, you should defo make more soon 🙂