
Hopefully, you are already using Google Analytics to track your visitor stats. If not, it’s time to get it installed. Google Analytics is a powerful free tool that provides robust insights into your site’s performance. But the data you are tracking needs to be accurate or it won’t do you any good. One major thing that can skew your Google Analytics data and cause inaccurate reporting is allowing it to track yourself.
Allowing Google Analytics to track your own visits to your site can really throw your numbers off. This can be especially noticeable when you are working on a new post, playing around with your blog design, or doing anything where you need to refresh the page often or move quickly between a few pages. Google will count all of these actions as real traffic when in reality, it’s just silly you playing around with your site.
The good news is that it’s super easy to block yourself from being tracked by Google Analytics. Below you’ll find two easy methods for accomplishing this.
RELATED: How to Install Google Analytics to WordPress & How to Install Google Analytics to Blogger
HOW TO BLOCK GOOGLE ANALYTICS FROM TRACKING YOUR OWN VISITS
1. Best Method
Currently, the best method out there is a Chrome extension which, when installed, will prevent Google Analytics from tracking your own visits to your website. What’s great about this method is that you can set a list of domains you don’t want your visits to be tracked on and the extension will automatically block your visits on only those specific domains.
How to install
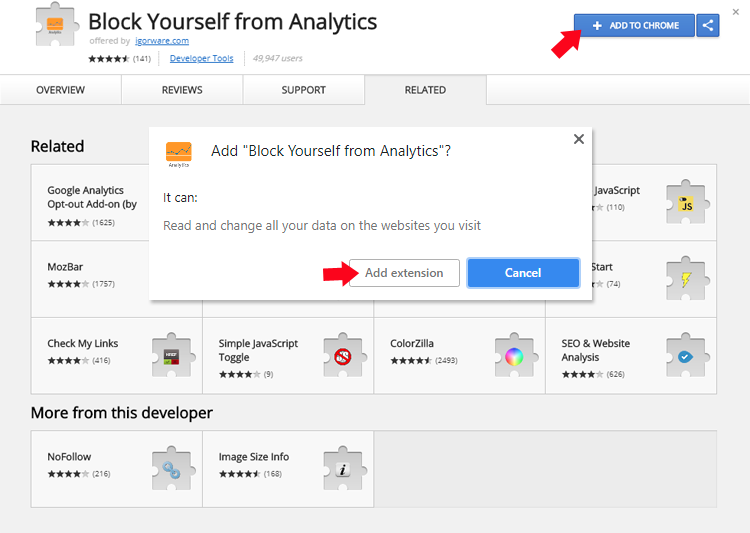
- Open your Chrome browser.
- Go here to access the extension: Block Yourself from Analytics.
- Click the blue + add to Chrome button and then in the popup click Add extension.
4. Now in the top right-hand side of your browser (just right of the address bar), you’ll see a new grayed-out icon that looks like this:
![]()
5. Now navigate to the website you don’t want your visits to be tracked by Google Analytics on. Click on that little icon and click Block Analytics for this website.
![]()
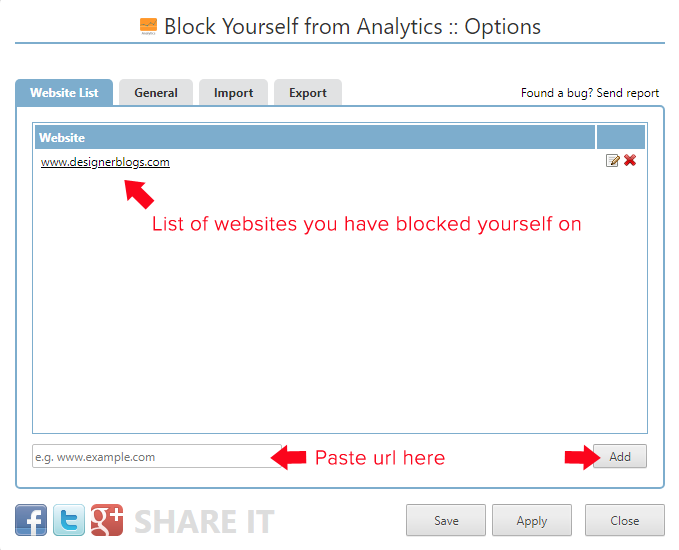
You can also click on Options to manually add any website you wish (without navigating there) and/or to view the list of websites you have blocked yourself on. To manually add a website in the Options section, paste in the URL to the website where it asks for the URL and then click Add. Then be sure to save your changes.
Advantage of this method: you can set specific websites to block yourself on.
Disadvantage of this method: only works for the Chrome browser.
2. Alternative Method
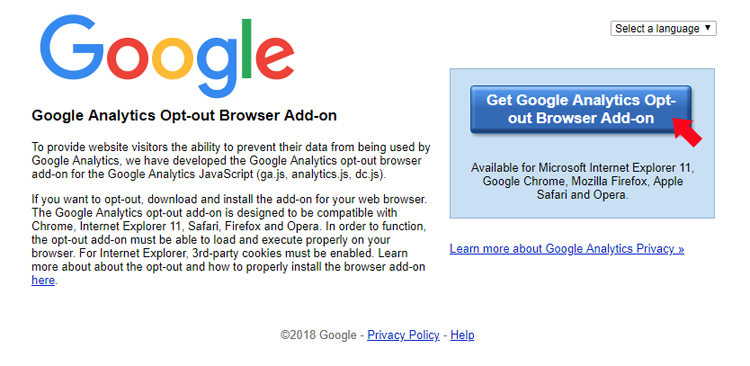
If Chrome isn’t your preferred web browser, then you can accomplish the same thing in any browser by installing the Google Analytics Opt-out Browser Add-on.
**Please keep in mind that this method will block you from ALL Google Analytics tracking on EVERY website out there, not just the tracking for your own blog.**
How to install
-
- Open the web browser you want to install the add-on to (Firefox, Chrome, Safari, Internet Explorer 11, or Opera).
- Go here: Google Analytics Opt-out Browser Add-on.
- Click the big blue Get Google Analytics Opt-out Browser Add-on button.
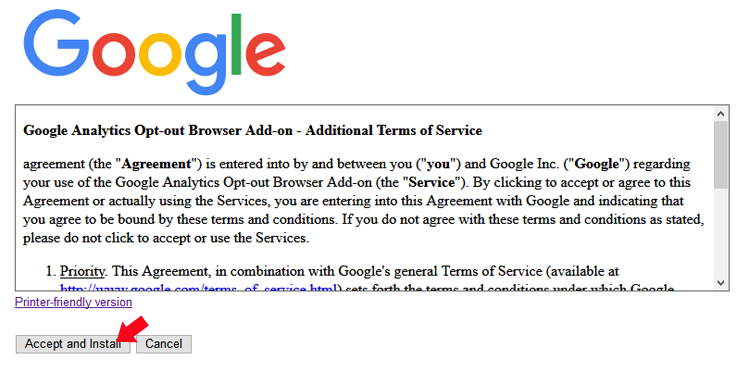
- Review the terms of service and then click Accept and Install. Continue to follow any prompts your computer gives you to install the add-on.
5. Now just repeat this process in all of the web browsers you use. The install process will be a little different in each browser, but you should get prompts to guide you along.
Advantage of this method: works on all web browsers.
Disadvantage of this method: blocks you from ALL Google Analytics tracking on EVERY website out there, not just the tracking for your own blog.


Thanks for the tips! I actually spent a long time trying to figure this out yesterday! I’m going to download the extension now.
Thank you ladies! I’ve been wondering how to remove myself from showing up in my analytics. Love your helpful tips!
Cheers,
Kristy
Nice information iam searching this for many times but not getting solution